Microvisor Quick Start
Danger
This is historical documentation, and tooling and console operations are no longer available.
This Quick Start is intended to help experienced embedded developers get up and running as fast as possible. If you are new to embedded development, we strongly recommend you start with Get Started with the Microvisor Nucleo Development Board rather than this guide.
The following instructions assume you have a KORE Wireless account and a Microvisor Nucleo Development board (NDB) that is powered up and connected to the Internet using the supplied Super SIM, WiFi, or Ethernet. It also assumes familiarity with Ubuntu and/or Docker on Widows and macOS. You must be familiar with Git on your preferred platform and have it installed.
The primary Microvisor development platform is Ubuntu 20.0.4.
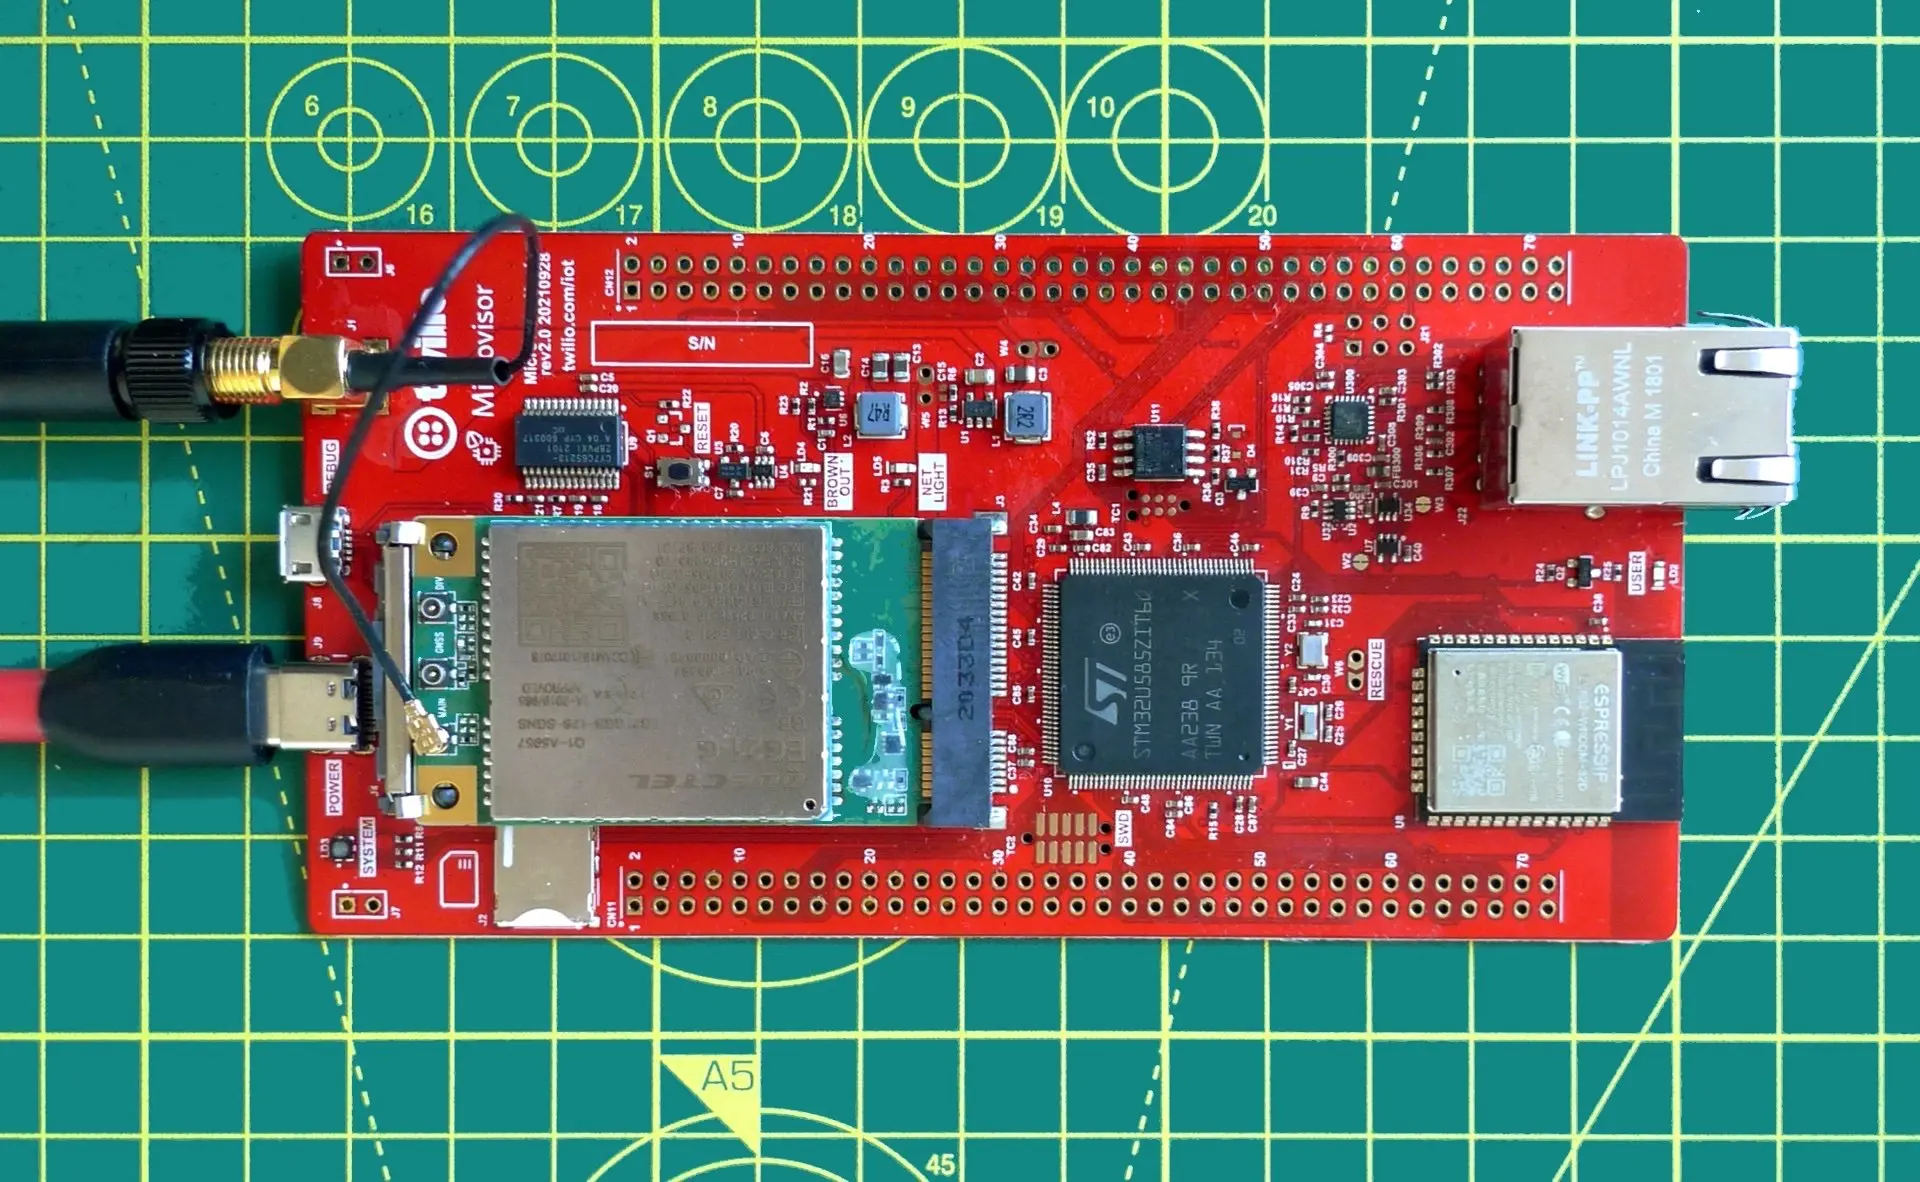
Nucleo Development Board
Windows
The recommended solution for working with Microvisor on Windows 10 and 11 is via Windows Subsystem for Linux 2 (WSL). You will need Administrator privileges to install WSL.
Open an Administrator-level Powershell or Command Prompt instance.
Run
wsl --install -d Ubuntu-20.04.Exit from Ubuntu and quit Powershell.
Open the Ubuntu 20.04 LTS shell from your Start menu.
Follow the command line instructions.
Alternatively, you can use Docker. You can also try native tools, but this is unsupported at this time.
macOS
The recommended solution for working with Microvisor on Mac is Docker, as outlined below. However, if you’re happy not to be supported, you can use native tools on macOS.
Command Line (Ubuntu/WSL)
1. Install the Prerequisites
sudo bash -c 'apt update && apt install -y gcc-arm-none-eabi binutils-arm-none-eabi \
    build-essential libsecret-1-dev cmake curl git jq wget gdb-multiarch'
2. Install the Microvisor CLI
curl -O -L https://korewireless.com/downloads/microvisor/latest
tar -xvf microvisor*gz
sudo mv microvisor /usr/local/bin
3. Set up the Microvisor CLI
microvisor login
Enter your account ID and your account api key.
4. Set Environment Variables
Enter the following command to get your target device’s ID:
microvisor devices list
Then set your device’s ID as an environment variable. It should be added to your shell profile:
export MV_DEVICE_ID=UVxxxxxxxxxxxxxxxxxxxxxxxxxxxxxxxx
Note
The QR code on the back of your board and on the anti-static bag in which it shipped also contains your NDB’s ID. Scan the code with your mobile phone and a suitable app, and the board’s ID is the third /-separated field.
5. Clone the Microvisor FreeRTOS Demo
git clone --recurse-submodules https://github.com/korewireless/Microvisor-Demo-CMSIS-Freertos.git && cd Microvisor-Demo-CMSIS-Freertos
6. Build and Deploy the Demo
microvisor deploy . --deviceid ${MV_DEVICE_ID} --genkeys --log
You have now completed the set-up and build process using the Linux command line.
Docker
This flow assumes you have Docker installed on your system and that you have started its daemon. It also assumes you have Git installed on your system.
1. Set Environment Variables
Set your KORE Wireless credentials as environment variables. The QR code on the back of your board and on the anti-static bag in which it shipped also contains your NDB’s ID. Scan the code with your mobile phone and a suitable app, and the board’s ID is the third /-separated field.
They should be added to your shell profile.
macOS
export ACCOUNT_ID=ACxxxxxxxxxxxxxxxxxxxxxxxxxxxxxxxx
export AUTH_TOKEN=xxxxxxxxxxxxxxxxxxxxxxxxxxxxxxxx
export MV_DEVICE_ID=UVxxxxxxxxxxxxxxxxxxxxxxxxxxxxxxxx
Windows Powershell
$env:ACCOUNT_ID="ACxxxxxxxxxxxxxxxxxxxxxxxxxxxxxxxx"
$env:AUTH_TOKEN="xxxxxxxxxxxxxxxxxxxxxxxxxxxxxxxx"
$env:MV_DEVICE_ID="UVxxxxxxxxxxxxxxxxxxxxxxxxxxxxxxxx"
Windows Command Prompt
set ACCOUNT_ID=ACxxxxxxxxxxxxxxxxxxxxxxxxxxxxxxxx
set AUTH_TOKEN=xxxxxxxxxxxxxxxxxxxxxxxxxxxxxxxx
set MV_DEVICE_ID=UVxxxxxxxxxxxxxxxxxxxxxxxxxxxxxxxx
2. Clone the Repo
macOS/Windows
git clone --recurse-submodules https://github.com/korewireless/Microvisor-Demo-CMSIS-Freertos.git && cd Microvisor-Demo-CMSIS-Freertos
3. Build the Image
macOS
docker build --build-arg UID=$(id -u) --build-arg GID=$(id -g) -t microvisor-freertos-image .
Windows
docker build -t microvisor-freertos-image .
4. Run the Build
macOS/Windows
docker run -it --rm -v .:/home/mvisor/project/ --env-file env.list --name microvisor-freertos microvisor-freertos-image
Under Docker, the demo is compiled, uploaded and deployed to your development board. It also initiates logging — hit Ctrl-c to break out to the command prompt.
You have now completed the set-up and build process using Docker.