FeatherClock
A compact MicroPython clock project
Latest Release: 1.4.0
About FeatherClock
FeatherClock is a project for the ESP32-based Adafruit Feather HUZZAH32 (hence the name) or the Raspberry Pi Pico W or , both running running MicroPython.
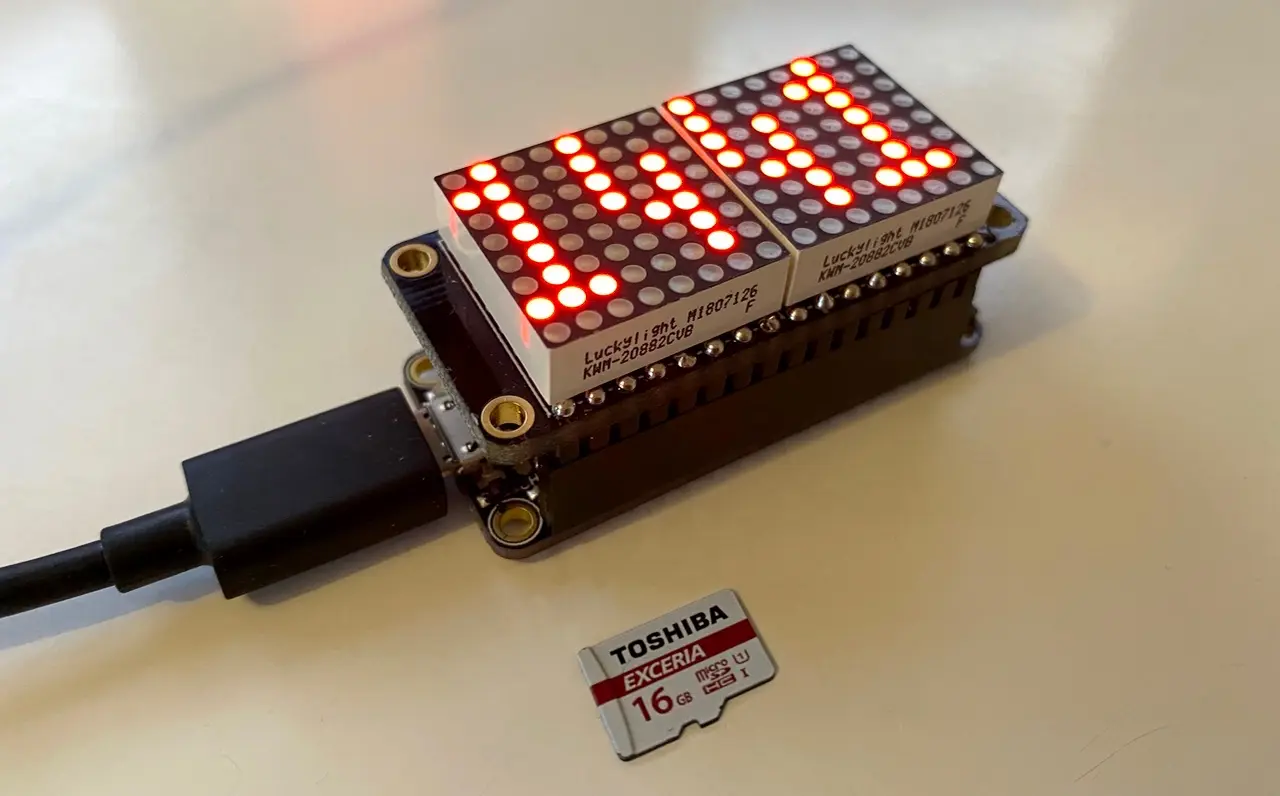
It uses the Adafruit FeatherWing four-digit, seven-segment LED add-on, or the equivalent 16 x 8 matrix LED add-on — or any other HT16K33-based segment LED for that matter. You’ll want a non-FeatherWing display if you’re assembling a Pico W, for which you’re free to select any of its I2C pins. The Feather/FeatherWing combo requires specific pins, but the display assembly fits directly on top of the MCU board into a single, convenient unit.
Note I previously supported the Adafruit Feather HUZZAH ESP8266, but this is no longer the case: its RTC is poor and it has too little memory. If you are using this board, you can find the original, un-updated code in the repo’s archive directory.
The code is an attempt to replicate my Electric Imp clock project. Currently, the clock has no remote control, which the Electric Imp Platform makes very easy to implement, but is rather less so here. You can set preferences, though. Adding a web UI, served locally or remotely, lies in a future phase of the project.
The project makes use of the HT16K33-Python library.
New Features
Version 1.4.0 includes the option to alternate the clock with a readout of the current outdoor temperature. This requires the prefs.json file to be updated with additional keys, and this has been done with the sample file included here (see Clock Settings, below). It is easy to turn off this feature if you don’t require it: change the value of the show_temp key to false, or comment out the line. By default, the clock will not enable this feature.
The temperature is collected from Open Meteo, which provides free access for low-volume, non-commercial applications. The code contains a basic Open Meteo integration class, which can be extracted and used elsewhere.
Version 1.4.0 of featherclock also includes the option to alternate the clock with a readout of the current day of the month and the month. This requires the prefs.json file to be updated with additional keys, and this has been done with the sample file included here (see Clock Settings, below). It is easy to turn off this feature if you don’t require it: change the value of the show_date key to false, or comment out the line. By default, the clock will show the date.
Installation and Setup
Pre-requisites
For ESP32 boards
- Install
pyboard.pyfrom GitHub.- Copy
pyboard.pyto a location accessible via your$PATH. Rename itpyboard.
- Copy
- Install
esptool.pyusingbrew install esptool
For Pico W boards
- Install
pyboard.pyfrom GitHub.- Copy
pyboard.pyto a location accessible via your$PATH. Rename itpyboard.
- Copy
- Download MicroPython and drop the
.uf2file onto the mountedRP2drive.
App Installation
Pre-requisites
- Set up a Python virtual environment
git clone https://github.com/smittytone/FeatherClockcd FeatherClockpython -m venv .pythonsource .python/bin/activatepip3 install -r requirements.txt- Continue as below. Once complete, run
deactivate
For ESP32 boards
- Connect your assembled FeatherClock (Feather plus LED add-on).
- Run
ls /dev/cu*(macOS) orls /dev/ttyAM*(Linux)- Note the Feather’s device file path.
- Update/install MicroPython:
1.
esptool.py --chip esp32 --port <FEATHER_DEVICE_PATH> erase_flash1.esptool.py --chip esp32 --port <FEATHER_DEVICE_PATH> --baud 460800 write_flash -z 0x1000 ESP32_GENERIC-20241129-v1.24.1.bin cd featherclock- Run
./install.sh <FEATHER_DEVICE_PATH> - Press
3for an ESP32 device. - Enter your WiFi SSID.
- Enter your WiFi password.
- After the code has copied, power-cycle your FeatherClock or press the RESET button.
For Pico W boards
- Connect your assembled FeatherClock (Pico W plus HT16K33-based LED).
- Run
ls /dev/cu*(macOS) orls /dev/ttyAM*(Linux)- Note the Pico’s device file path.
- Update/install MicroPython:
- Copy across (for example)
RPI_PICO_W-20250415-v1.25.0.uf2
- Copy across (for example)
cd featherclock- Run
./install.sh <FEATHER_DEVICE_PATH> - Press
Wfor a Pico W. - Enter your WiFi SSID.
- Enter your WiFi password.
- After the code has copied, power-cycle your FeatherClock.
Clock Settings
For now, the clock’s prefs are set by sending over a prefs.json file with the following values:
{ "mode":   <true/false>,       # 24-hour (true) or 12-hour (false)
  "colon":  <true/false>,       # Show a colon between the hours and minutes readouts
  "flash":  <true/false>,       # Flash the colon symbol, if it's shown
  "bright": 10,                 # Display brightness from 1 (dim) to 15 (bright)
  "bst":    <true/false>,       # Auto-adjust for Daylight Saving Time
  "do_log": <true/false>,       # Write log data to the file `log.txt` on the device
  "show_date": <true/false>,    # Alternate clock with day and month readout
  "show_temp": <true/false>,    # Alternate clock with outside temperature
  "lat": float,                 # Your location, in latitude and longitude
  "lng": float
}
Having installed pyboard.py as above, you send over prefs file using:
pyboard.py -d <FEATHER_DEVICE_PATH> -f cp prefs.json :prefs.json
However, the install.sh script does this for you, and allows you to enter your WiFi credentials
To get <FEATHER_DEVICE_PATH>, you can add my Z Shell function dlist() to your .zshrc file. After restarting your terminal, you can run:
./install.sh $(dlist)
Source Code
You can view FeatherClock’s source code at GitHub.
Release Notes
- 1.4.0 18 July 2025
- Add local temperature readout to alternate with clock readout.
- Add day and month readout to alternate with the clock readout (and temperature readout, if enabled).
- Minimise MicroPython display memory allocations.
- 1.3.0 24 January 2023
- Add experimental Trinkey RP2040 version.
- Better resilience to WiFi connection loss.
- Better log file management.
- Update to latest HT16K33 drivers.
- Archive ESP8266 version.
- 1.2.3 23 February 2022
- Add better help in
install.sh. - Device-side errors now issued to log file.
- Correct pyboard instructions.
- Add better help in
- 1.2.2 5 February 2022
- Style install script errors.
- Update
esptool.pyinstallation instructions. - Add
dlist()link. - No application code changes.
- 1.2.1 13 September 2021
- Clarify installation instructions for ESP32 and ESP8266 boards.
- Update install script.
- No application code changes.
- 1.2.0 26 August 2021
- Fix for post time-check pauses.
- Update install.sh to use MicroPython’s
pyboard.py. - Update install.sh to copy
prefs.jsonover if it is present in the working directory.
- 1.1.0 3 December 2020
- Revised code.
- Added matrix display version.
- 1.0.10 19 November 2020
- Adds Feather Huzzah 32 version.
- 1.0.9 29 September 2020
- Improved RTC time checks.
- Improved installation script.
- 1.0.8 6 September 2019
- Add installation script.
- 1.0.7 25 April 2019
- Added the loading of an on-device preferences file (
prefs.json).
- Added the loading of an on-device preferences file (
- 1.0.6 13 April 2019
- Added app preferences structure.
- 1.0.5 10 April 2019
- Corrected the months used for BST checking.
- 1.0.4 9 April 2019
- Various linting-suggested code improvements.
- 1.0.3 8 April 2019
- Improved RTC updates by making NTP checks.
- 1.0.2 5 April 2019
- Added regular RTC updates.
- 1.0.1 4 April 2019
- Added disconnection indicator to display.
- Corrected constant usage.
- 1.0.0 3 April 2019
- Initial release.
Related Software
Site and software copyright © 2026, Tonçy Smith